
Learn How to Seal Marble Countertops Effectively

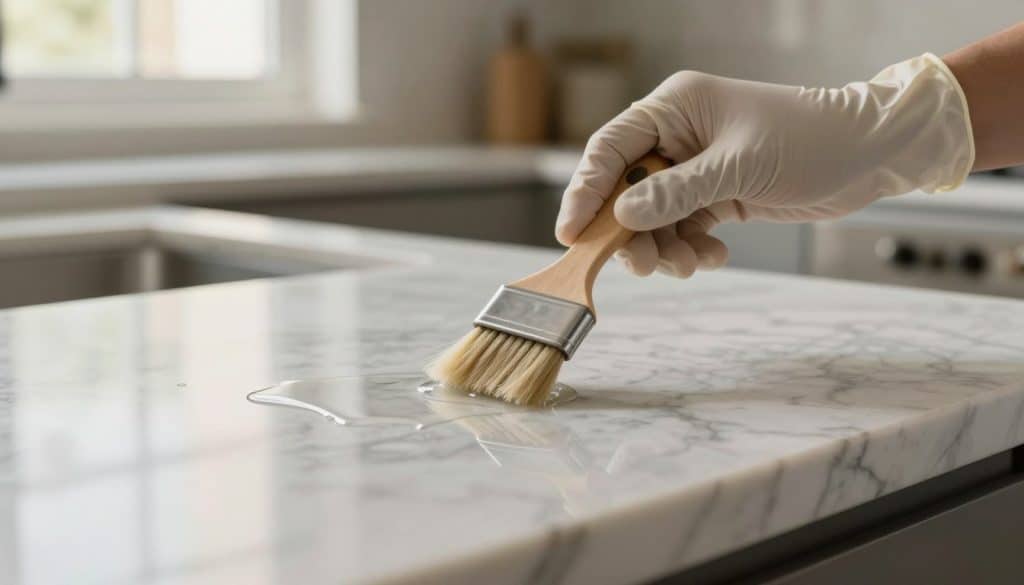
A close-up of a marble countertop undergoing a sealing water test. The foreground features a droplet of water pooling on the polished surface, highlighting the reflective quality of the marble. In the middle ground, a hand wearing a latex glove is gently applying a clear sealant with a small brush, emphasizing a meticulous approach to maintenance. The background showcases a well-lit kitchen setting with soft, natural light filtering through a nearby window, creating a warm and inviting atmosphere. The angle captures the countertop's elegant patterns, underscoring its beauty and sophistication. The mood conveys a sense of care and professionalism, ideal for maintaining marble surfaces. - how to seal marble countertops

Can learning how to seal marble countertops really buy you time against stains while still leaving your surface vulnerable to lemon and vinegar? We ask that because sealing mainly slows liquid absorption into pores; it does not stop etching from acids.

We’re Rock Solid Tops, your Minneapolis, MN countertop partner with 30+ years fabricating and installing stone. Our Craftmanship, Your Vision—fast, local, and professional. We can install new surfaces in as little as one week after measuring.

In this short guide we’ll explain what sealing does for your day-to-day kitchen life and what it won’t fix. You’ll get a clear preview of testing current protection, choosing a sealer, proper prep, sectioned application, and curing. We’ll also tell you when a DIY makes sense and when it’s smarter to call a pro.

For a free estimate, callt (612) 270-4239or email info@rocksolidtops.com. We serve Minneapolis–St. Paul and nearby areas within an hour of the Twin Cities.

Key Takeaways

  • Sealing slows absorption and gives you time to wipe spills before stains set.
  • Sealers do not prevent etching from acidic liquids like lemon or vinegar.
  • We’ll walk you through testing, prepping, applying, and curing the surface.
  • DIY works for small, healthy surfaces; call us for large jobs or existing damage.
  • Rock Solid Tops offers 30+ years of experience and quick installation—call or email for a free estimate.

Why sealing marble countertops matters for stain protection and long-term care

Protecting a natural stone surface means managing two different threats: color stains and chemical dulling. We’ll keep this practical and clear so you can make smart maintenance choices for your kitchen.

Staining is when spills soak into tiny pores and leave color behind. Etching is a different issue — acids dull the finish and sealing usually won’t stop that.

Staining versus etching

Marble and other natural stone are hard but porous. Those microscopic capillaries act like tiny pathways for spills.

How sealers slow absorption

A quality sealer lines those pores and slows liquid absorption. That gives you time to wipe up coffee, oil, or water before a permanent stain forms.

  • Common trouble spots: rings near sinks, oil by the stove, coffee around the brewer.
  • Sealers reduce cleanup stress and help preserve long-term beauty.
  • Pro tip: Etches can be fixed separately, but sealing is worth it—stains cause the bigger visual problem over years.

We’ve worked with natural stone across Minneapolis–St Paul for decades. Count on Rock Solid Tops for practical, lasting protection and maintenance advice that fits real kitchens.

How to tell if your marble countertop needs sealing or resealing

A quick spot test tells you far more than a calendar reminder when it comes to surface protection. We’ll show two simple checks that take only a few minutes and give a clear read on absorption.
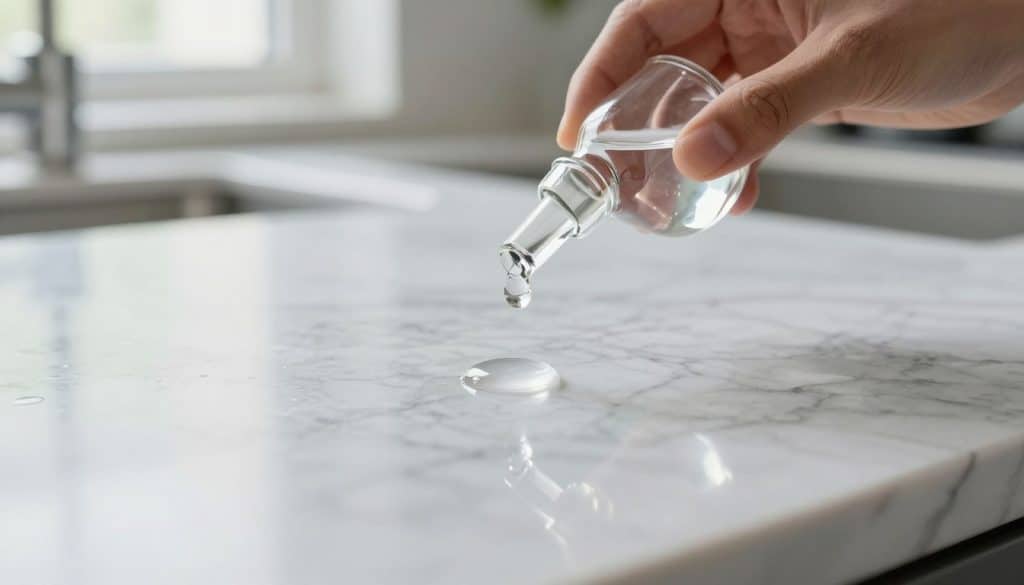
A close-up view of a marble countertop being tested for sealant effectiveness, featuring a clear water droplet resting on the surface. The droplet should reflect light brilliantly, showcasing the glossy finish of the marble. In the foreground, subtle details of the marble’s natural veins and patterns are visible, emphasizing its elegance. The middle ground features a hand holding a small glass vial of water, carefully positioning it above the drop, symbolizing the testing process. Soft, diffused natural light from a nearby window bathes the scene, creating a calm and inviting atmosphere. In the background, a hint of a kitchen setting with tasteful decor, but with the focus clearly on the countertop, enhancing the professional aesthetic of the image.

The water drop test

Place a small drop of water on an out-of-the-way area, like near a backsplash or corner. Set a phone timer for 10 minutes and watch for darkening.

If the water darkens the stone within 10 minutes, the finish is absorbing moisture and it’s time for action. If it beads or sits, your surface is likely still protected.

The mineral oil test

Apply a few drops of mineral oil and wait about 10 minutes. Wipe the oil away. A temporary dark spot that fades means the oil evaporated; a lasting mark signals weak protection.

  • Test discreet spots so you don’t worry about appearance.
  • Use minutes and a timer for an objective result.
  • If both tests show fast absorption, schedule a reseal. If results are mixed, use the oil test as confirmation.

Prefer expert eyes? Rock Solid Tops can evaluate your stone countertops and recommend the right care and maintenance across Minneapolis–St Paul.

Choosing the right marble sealer for your kitchen surface

Not every sealer works the same on natural stone; choosing the correct type saves time and grief later. We’ll keep this simple and practical for homeowners and managers.

Penetrating sealers vs surface coatings

Penetrating or impregnating products soak below the finish and slow absorption without forming a film. They work best for daily wear in a busy kitchen.

Surface coatings sit on top. They can chip, peel, or haze in real use. For cooking areas we usually avoid them.

Water-based, solvent-based, and food-safe notes

Water-based sealant has low odor and easy cleanup. Solvent-based options often penetrate deeper but have stronger fumes.

Food-safe matters: most modern products are safe after full cure. Read the label and follow the instructions.

Finish, porosity, and a quick checklist

Honed marble often needs extra coats. Polished stone absorbs less but still benefits from protection.

  • Confirm dwell time and recommended coats.
  • Check wipe-off timing to avoid haze or sticky residue.
  • Match product choice to your cooking habits and sink use.

We help Minneapolis clients match material and finish with the right product. Follow the directions and you’ll get lasting, invisible protection.
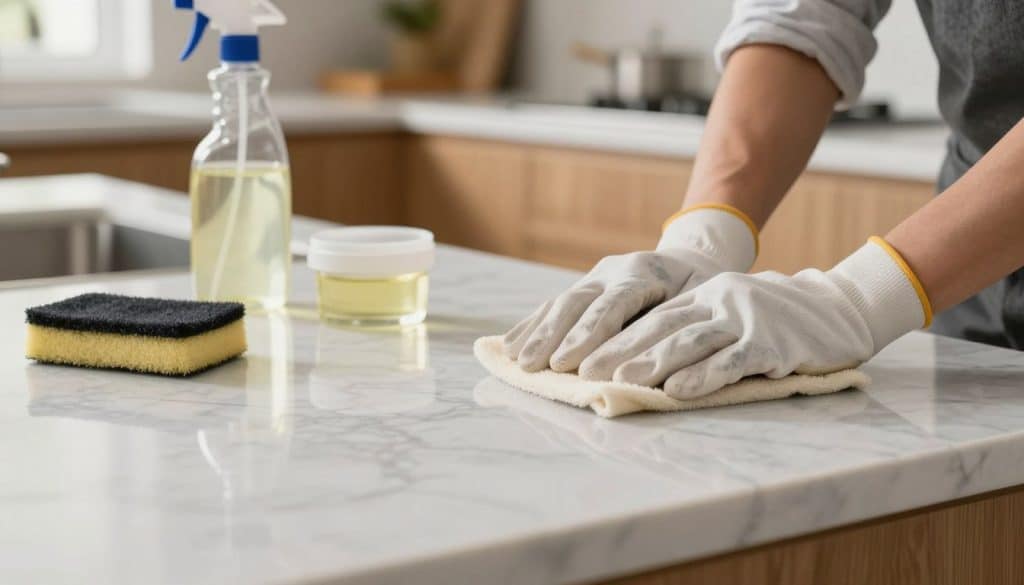
A close-up view of a marble countertop in the foreground, showcasing the texture and natural veining of the stone, glistening under soft, diffused natural lighting. Surrounding the countertop, various preparation tools lay neatly arranged: a gentle scrubbing pad, a spray bottle with a cleaning solution, and a small container of mineral oil, emphasizing the prep work required before sealing. In the middle ground, a pair of hands in professional work gloves are carefully wiping the surface, their focus illustrating meticulous attention to detail. In the background, a softly blurred kitchen environment with warm, inviting colors sets a calming atmosphere, enhancing the notion of a clean, well-prepared space. The overall mood is one of professionalism and care, reflecting the importance of proper prep work for lasting results.

Prep work that makes the sealing process last

Good prep beats luck: cleaning and inspection set the stage for a long-lasting finish. We treat the area like a craft job and move deliberately so the product performs as promised.

Cleaning and degreasing without locking in stains

Thorough cleaning matters because a sealer can trap discoloration beneath it. Start with a non-abrasive cleaner and a soft cloth, removing crumbs, grease, and sticky residues.

For stubborn gunk, use acetone or mineral spirits sparingly and with ventilation. These materials dissolve adhesives but won’t harm stone when used correctly.

Dry time, ventilation, and protecting nearby cabinets, sinks, and walls

Let the surface dry fully. Moisture prevents proper penetration and ruins coverage on a countertop. Open windows or run a fan and wear gloves for safety.

Protect adjacent cabinets, sinks, and walls with tape and tarps. Small prep steps save big repairs later.

  • Use soft cloths and non-abrasive cleaners for safe, even cleaning.
  • Degrease cooktop areas well so oils don’t block absorption.
  • Allow full dry time and keep good airflow during the job.
  • Cover nearby finishes and check for stains before you apply a seal—don’t lock them in.

If you find deep stains, cracks, or recurring marks, call Rock Solid Tops. We’ll inspect the stone and help you make sure the surface is ready before any product goes on.

How to seal marble countertops step by step

A careful, section-by-section approach keeps results consistent and stress-free. We focus on small zones, clear minutes for dwell time, and steady technique so you “do it once, do it right.”

Gather tools and materials

  • Materials: applicator pad, soft cloths, painter’s tape, gloves, and your chosen sealant.
  • Have a second cloth ready for wipe-off and a dry buffing rag.

Test a small area first

Pick an out-of-sight spot and follow the product instructions. Wait the recommended minutes or up to 24 hours to confirm no haze or finish change.

Apply by sections and manage dwell time

Work in 2–3 foot zones. Spread a thin, even coat so the stone stays wet for the label’s dwell minutes. Keep an eye on edges.

Wipe excess, add a second coat if needed, then buff

Remove excess before it dries to avoid hazy streaks. If the stone absorbs quickly, apply a second coat after the recommended time. Finish by buffing for an even sheen and lasting protection.

Pro tip: Follow the instructions on the sealer label — it’s the final word. We’ll help when you want a pro touch for larger jobs!

fixing scratches in marble - how to seal marble countertops

Curing time, when to use your counters, and how often to reseal

Letting a sealer set properly pays off in longer protection and fewer surprises. Typical cure windows are 24–48 hours. That range lets the product finish bonding below the surface so it performs as promised.

During the first day, use the area lightly. Avoid heavy cooking, standing water, and placing items that trap moisture. Light use means quick, careful tasks; normal use can resume after 48 hours if the label allows.

When to check and reseal

Don’t guess with a calendar. Use a small water or mineral oil test when you notice wear. If water darkens the stone within minutes, absorption is active and it’s time for resealing.

  • Some surfaces go years between service, others need attention in months.
  • High-use sink zones and porous stone require more frequent checks.
  • Good daily habits—wipe spills quickly—extend the interval between treatments.

If maintenance feels like a chore, we’ll help you choose a lower-care surface or replace it fast. Rock Solid Tops serves Minneapolis–St Paul and can install new countertops in as little as one week after measuring.

Conclusion

A proper finish gives everyday spills a fair chance of being wiped away before they leave a mark.

Sealing slows absorption and boosts stain protection, but it won’t stop etching from acids. The right prep, correct application, and full cure drive results every time.

Quick checklist: test first, prep well, apply in small sections, respect dwell time, wipe excess before it dries, buff clean, and let the surface cure.

Use the water test periodically and reseal only when the stone shows it needs it. If you want a bigger upgrade, ask about lower-care natural stone options.

Rock Solid Tops — Our Craftmanship, Your Vision. Call (612) 270-4239 or email info@rocksolidtops.com for a free estimate in Minneapolis, MN, Minneapolis–St Paul, and within an hour of the Twin Cities. With 30+ years fabricating and installing stone, we can install new countertops in as little as one week after measuring.

FAQ

Learn How to Seal Marble Countertops Effectively?

We recommend a clear plan: pick a penetrating, food-safe sealer, prep the stone, apply thin even coats, and allow full cure. Use a clean cloth or applicator pad, work in small sections, wipe excess before it skins, and buff for a uniform sheen. For Minneapolis projects, we follow manufacturer dwell times and local ventilation best practices.

Why does sealing marble matter for stain protection and long-term care?

Sealing slows liquid absorption so coffee, oil, and water are less likely to penetrate. It doesn’t make marble invulnerable, but it reduces staining risk and simplifies routine maintenance, extending the surface’s life and preserving appearance.

What’s the difference between staining and etching, and can a sealer prevent etches?

Stains come from absorbed liquids and pigments; etching is surface damage from acids like lemon or vinegar. Sealers help prevent stains by blocking absorption but cannot stop etching — acids still react with calcium carbonate in the stone.

How do sealers slow absorption from water, coffee, oil, and other liquids?

Penetrating sealers fill capillaries in the stone, creating a hydrophobic barrier that reduces liquid uptake. That means spills bead longer on the surface, giving you more time to clean before stains set.

How can you tell if your marble surface needs sealing or resealing?

We use simple tests: place a few drops of water on the surface. If it darkens within a minute or two, the stone is absorbing moisture and needs resealing. The mineral oil test is similar but shows weaker protection because oil soaks in more slowly.

What is the water drop test and what does darkening mean for the surface?

Put a teaspoon of water on the stone and time it. If the area darkens immediately or within a minute, porosity is high and resealing is due. If it beads and remains unchanged, the current protection is adequate.

How does the mineral oil test spot weak protection?

Mineral oil soaks into pores more readily than water and reveals microscopic absorption. Apply a small drop, wait 10–15 minutes, then wipe. Persistent darkening means the sealer isn’t effective or has worn thin.

How do we choose the right sealer for a kitchen surface?

Match product type to use: penetrating or impregnating sealers for natural stone kitchens, and food-safe, low-odor formulations for indoor use. Consider finish (honed vs polished), porosity, and whether you need a water-based or solvent-based product for performance and cleanup.

What’s the difference between penetrating/impregnating sealers and surface coatings?

Penetrating sealers absorb into pores and leave the look of the stone intact. Surface coatings form a film on top and can alter gloss and feel. For natural kitchen stone, we usually prefer penetrating sealers for longevity and natural appearance.

Should I choose water-based or solvent-based sealants?

Water-based sealers are lower odor, easier to clean, and safer indoors; solvent-based often penetrate deeper and may last longer but require more ventilation. We assess the job and recommend the best fit, balancing performance with onsite safety.

Are there food-safe considerations for kitchen countertops?

Yes. Use sealers labeled food-safe or safe for food-preparation surfaces. Follow cure times before placing food directly on the stone. Manufacturer instructions will specify when counters are safe for regular kitchen use.

How do finish and porosity (honed vs polished) affect sealer choice?

Honed surfaces are matte and typically more porous; they may need more frequent sealing. Polished marble has fewer open pores but still benefits from protection. Choose a sealer compatible with the finish to avoid haze or uneven sheen.

What product direction checklist prevents haze, residue, and uneven coverage?

Clean thoroughly, remove wax or previous topical sealers, follow manufacturer dilution and application steps, apply thin coats, wipe excess promptly, and test in an inconspicuous spot. Proper ventilation and correct dwell time prevent film and streaks.

What prep work makes the sealing process last?

Deep-clean with a pH-neutral stone cleaner and a degreaser if needed. Remove all residues, rinse, and let the stone dry fully for 24–48 hours. Mask nearby cabinets and sinks, and ensure good airflow to aid curing.

How long should the surface dry and how important is ventilation?

Allow at least 24 hours of dry time before sealing after cleaning, longer for dense or recently installed stone. Ventilation helps solvents evaporate and aids cure; we use fans and open windows when possible.

What tools and materials should we gather before starting?

Have a quality penetrating sealer, clean microfiber cloths, applicator pads, painter’s tape, nitrile gloves, and a clean bucket. Keep the product’s data sheet handy for dwell and cure times.

Why test in a small area before sealing the whole surface?

Testing reveals how the sealer behaves on your stone — absorption rate, color change, and final sheen. It prevents surprises like haze, darkening beyond acceptable levels, or incompatibility with the finish.

How should we apply a thin, even coat by sections and manage dwell time?

Work in manageable sections, apply the sealer evenly with a pad, let it sit the manufacturer’s recommended dwell time so it can penetrate, then wipe off excess before it dries. Repeat across the countertop until complete.

Why is wiping off excess sealer before it dries important?

Excess that dries on the surface can cause hazy streaks and a tacky feel. Prompt removal ensures the sealer remains only in the pores and leaves the surface clean and consistent.

When is a second coat necessary for porous stone?

If the first coat darkens quickly or the water/mineral oil test still shows absorption after curing, apply a second thin coat. Many porous marbles need two coats for full protection; follow product instructions for timing.

How and when should we buff the surface for a consistent finish?

After final wipe and cure time, use a dry microfiber cloth to buff and remove any residual film. Buffing evens sheen and gives a polished look without adding polish or wax unless desired.

What are typical curing windows and when can we use the countertops?

Most sealers require 24–48 hours before light use and up to 72 hours for full cure. Avoid heavy pots, prolonged water exposure, or placing cutting boards directly on the freshly cured surface until the manufacturer’s full cure time has passed.

How often should we reseal based on absorption rather than a calendar?

Reseal when absorption tests show darkening — typically every 1–3 years for many stones, but high-traffic kitchen surfaces may need more frequent checks. We encourage testing annually and resealing as needed.

What common household liquids are most likely to cause staining if the sealer fails?

Coffee, red wine, cooking oils, citrus juices, and sauces are common culprits. Prompt cleaning reduces risk, and a working sealer buys you extra time to wipe spills before they absorb.

Can improper cleaning products damage sealed marble?

Yes. Acidic or abrasive cleaners can dull or break down both the stone and some sealers. Use pH-neutral stone cleaners for routine care and avoid vinegar, bleach, or generic bathroom cleaners.

What maintenance routine keeps sealed stone looking great between reseals?

Wipe spills immediately, clean daily with a pH-neutral stone cleaner, use coasters and cutting boards, and perform the water or mineral oil test yearly. Regular care extends the life of the sealer and the stone.

If I see haze or residue after sealing, what should I do?

Remove haze with a stone-safe cleaner or a manufacturer-recommended remover. Lightly buff with a microfiber cloth. For persistent film, we may recommend stripping and resealing professionally to restore a clean finish.

When should a homeowner call a professional like Rock Solid Tops?

Contact us for new installations, deep-set stains, unwanted etching repair, or if you’re unsure which sealer fits your marble. We provide expert product selection, proper application, and local service across Minneapolis–St. Paul.